I've written this article in order to describe the process that goes into making most jewelry by hand. In our shop we make our jewelry using what is referred to as the silver smithing method, rather than casting. In silver smithing a piece of jewelry is made by attaching multiple pieces of silver together using jewelers solder. Each piece has to be made individually and is unique. In casting, which is used by most manufacturers, each piece is made in a mold and can be mass produced in bulk quantities.
You can follow along with me as I make a custom order ring using a large piece of turquoise and sterling silver. This guide is meant to help our customers understand the processes we use to make their jewelry and for any aspiring metal smiths to use as a guide in getting started.
This artical was also published in the February 2011 Issue of Rock and Gem Magazine.
Cheers,
Austin Moore
Looking for Turqoise jewelry? Try a search:
http://www.earthartgems.com/search?search_fulltext=turquoise
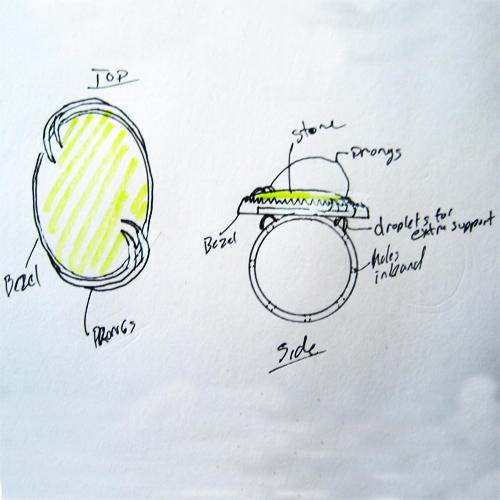
Most of our designs start as an idea. Either in our own heads, or in the minds of one of our clients. A drawing is the best way to convey what a finished piece will look like, especially when communicating online. It is important to remember that the finished item will be similar to the drawing, but never exactly like it. In this drawing we see a detailed layout and an explanation to the buyer as to what element is, and if needed, what purpose it serves. In this case, I have been asked to make a large statement ring using turquoise as the stone. We have selected a large cabochon and now I have drawn up a design for the buyer to approve.
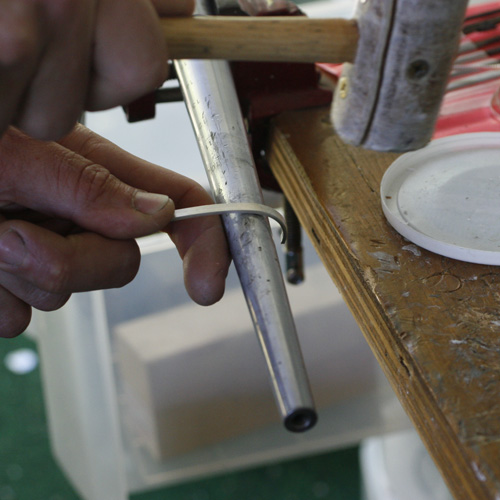
Starting to make the ring: This ring has two basic parts; the ring, or band, and the setting. In this case we are using a serrated bezel. It does not matter which you make first, I usually like to start with the band. First I select a wire stock, in this case we are using a thick rectangular wire stock. The wire is hammered around a ring mandrel with a rawhide mallet. This mallet is hard enough to bend the metal, but won't leave a mark.
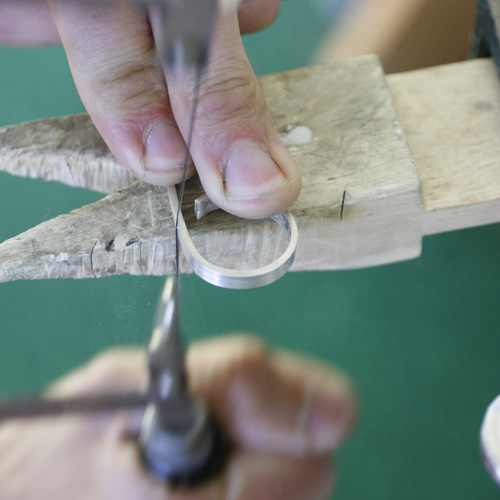
Once the ring is bent most of the way around, I saw through the wire, guessing where to cut based on the size I need to make the ring. This "guess" becomes easier with experience.
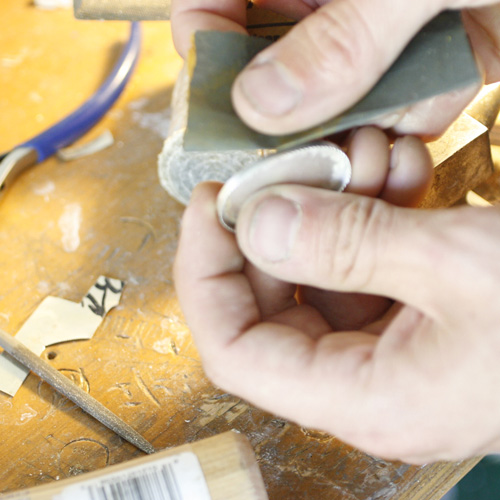
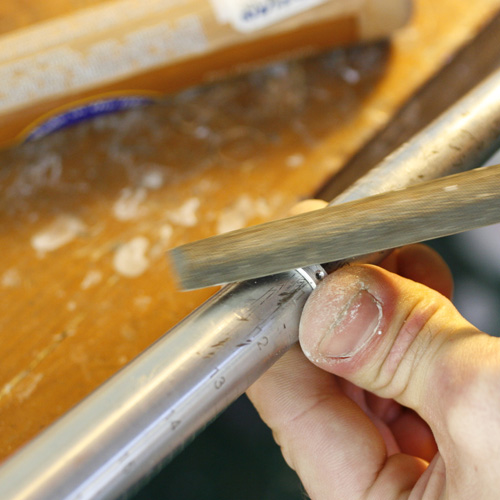
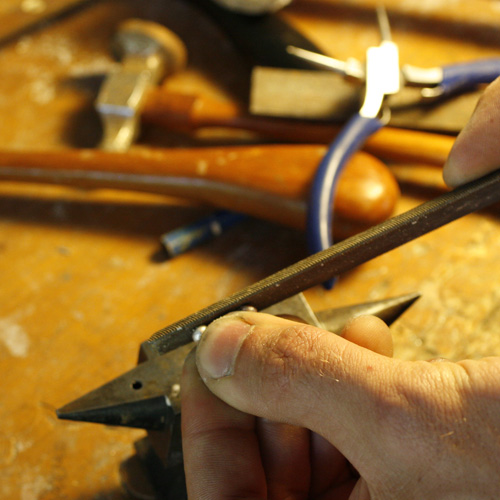
After cutting the wire, I file the ends smooth so that when I bend it into a circle the ends will meet up in a smooth joint. Many people will use a vise to hold the ring while filing and sanding, I prefer to just hold it in my fingers.

Getting ready to solder the ring. Before all soldering operations I apply a thin layer of flux to the entire piece. I make sure to get solder on the planes that are going to receive the solder. In this case, the ends of the joint. I don't show photos of applying flux in any of the other steps, but it is something that is done every time you solder.
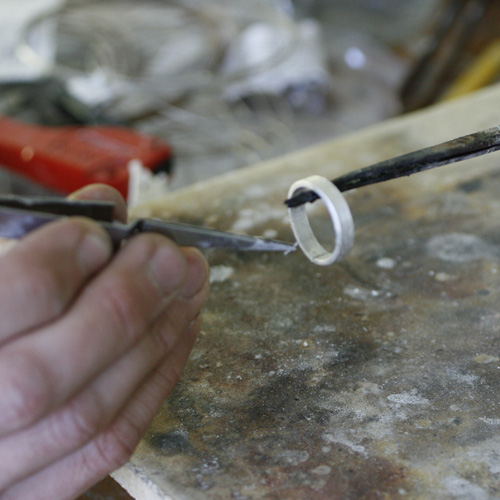
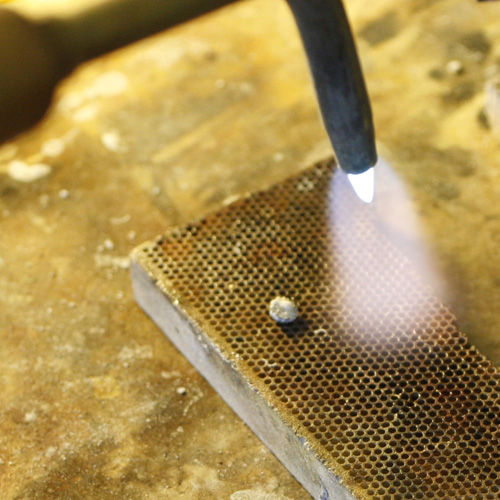
The ring is held in a pair of soldering tweezers and a small piece of hard solder (melts at a high temperature) is set on top of the joint in the ring.
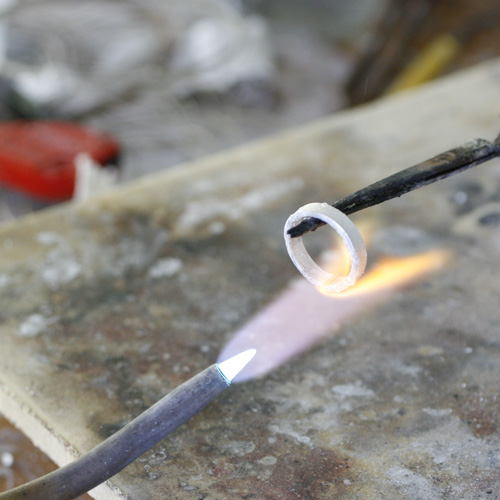
The ring is heated evenly with a hand held torch. I use an acetylene torch. Just before the solder melts the flame is brought to the opposite side of the joint so that the solder will flow into the joint, towards the flame. Solder will always follow the heat!
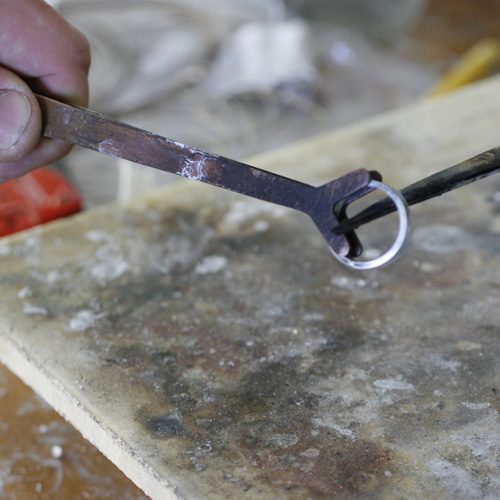
The ring is removed using a pair of copper tongs, careful not to touch the very hot tweezers...
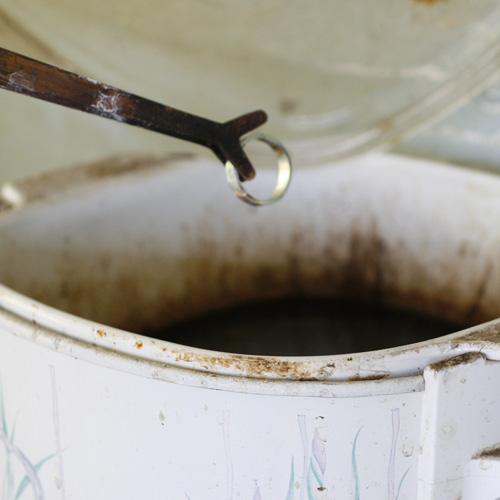
...and dunked in a bath of mild acid which we metal smiths call "the pickle". this will clean off all of the extra flux and any other residue from the soldering operation. I use copper tongs because steel tongs will react with the acid in a minor explosion! Just kidding! It won't explode, but the steel and acid will react and end up copper plating the silver ring... odd I know but that's chemistry for you!
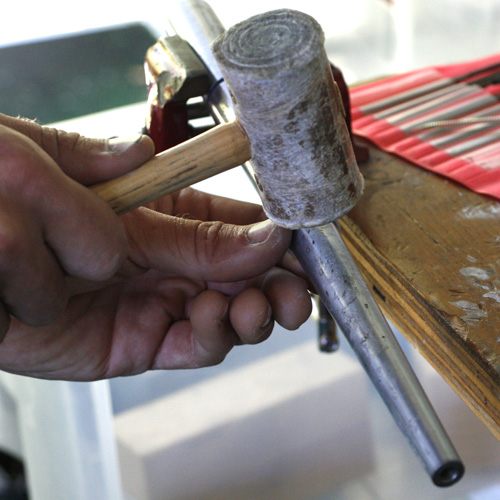
The ring is then slid back on the ring mandrel and hammered with the rawhide mallet. This will round out the ring into a near perfect circle.
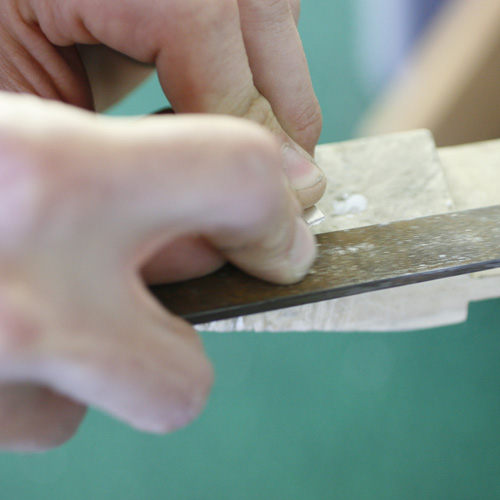
The edges of the solder joint are filed smooth...
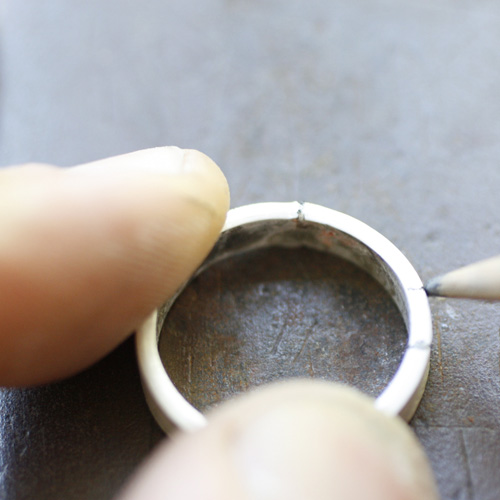
In this design, I am going to make 7 holes spaces evenly around the ring. I mark along the outside with a pencil where I want to place each hole.
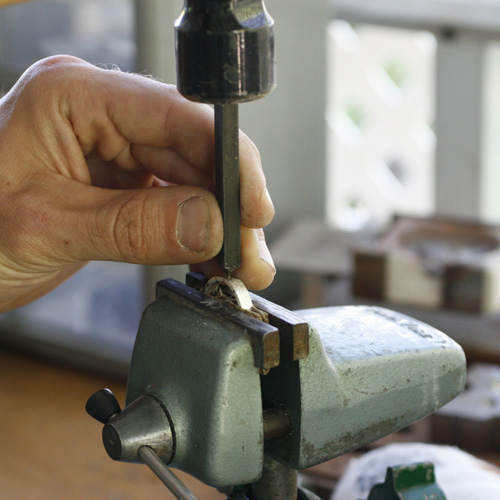
The ring is clamped down in a vise with two pieces of cardboard on either side to keep the vise from leaving a mark. I use a pointed metal stamp to make a small mark where each hole will be drilled.
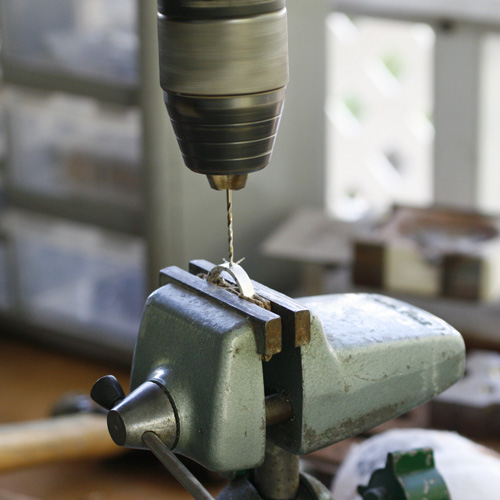
One of the few power tools I use: a hand held drill... because let's face it: power tools are fun! I use the drill to carefully drill each hole.
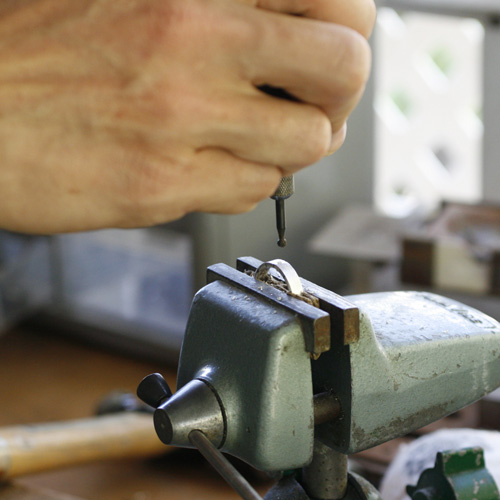
The design calls for the outside of each hole to be beveled so I use a round metal bur in a Dremel tool to route out the top portion of each hole.
The stamp, drill, bur operation is done for each of the 7 holes around the ring. At this point the band is almost done. and I move on the bezel setting for the stone.
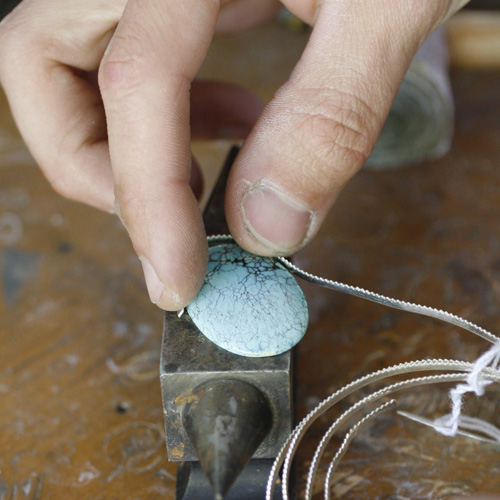
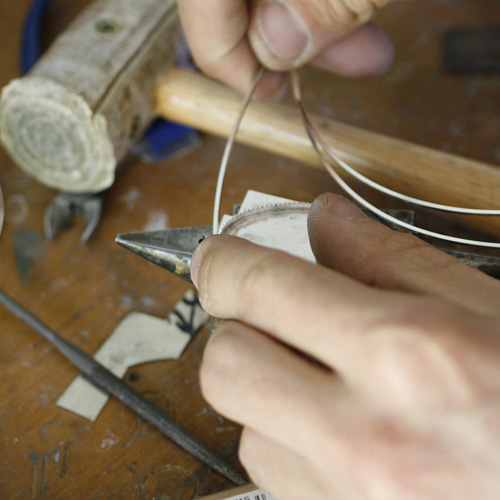
I lay the stone on a smooth flat surface and wrap the bezel wire around the stone tightly and cut the wire where it overlaps.
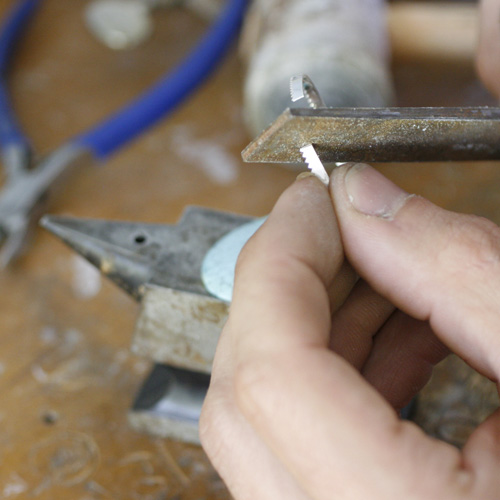
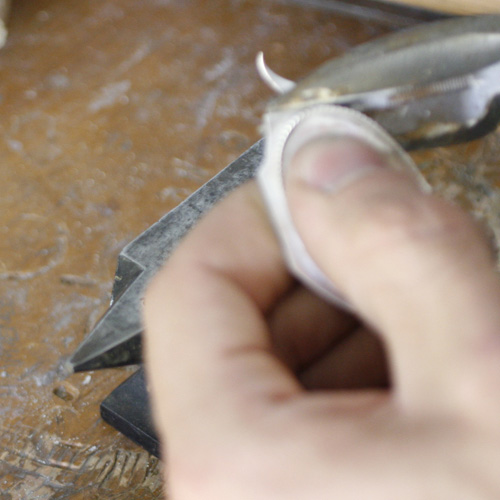
The ends are filed smooth. This is similar to making the ring, but the wire is much smaller and more delicate.
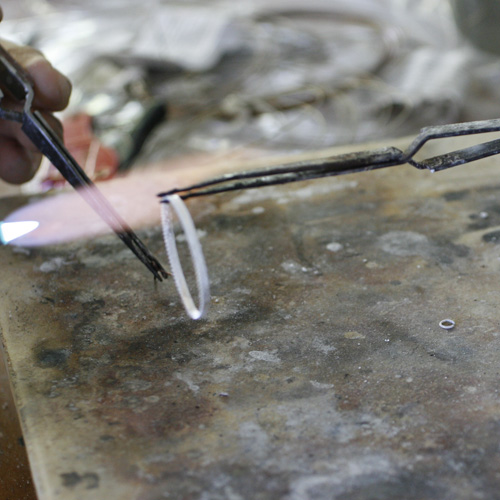
The flux has been applied and the soldering is done to connect the two ends of the bezel into a loop. Since this is fine silver and is very thin, a lot of care must be taken to not melt any portion of the loop.
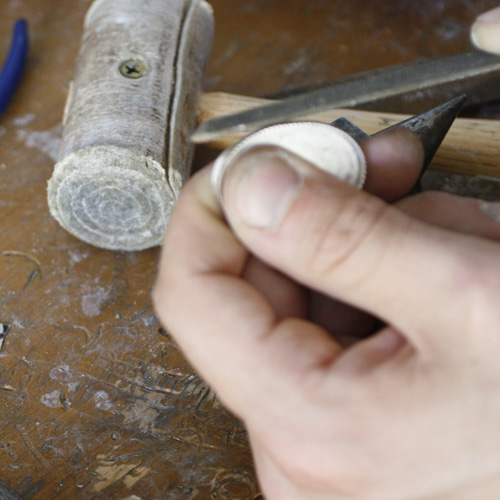
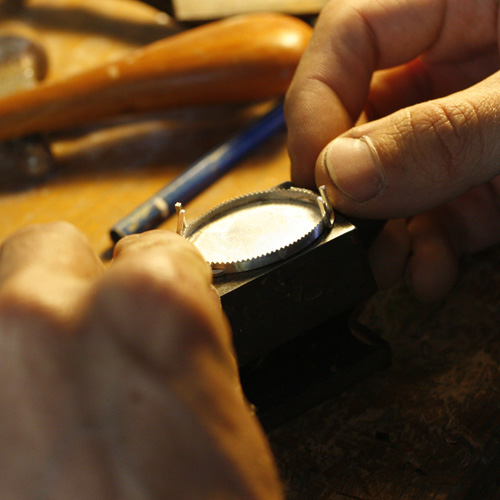
After cleaning the piece in the pickle the bezel is set around the stone to ensure a proper fit. I will tap it lightly all the way around to "set" it and cause it to retain its shape once the stone is removed.
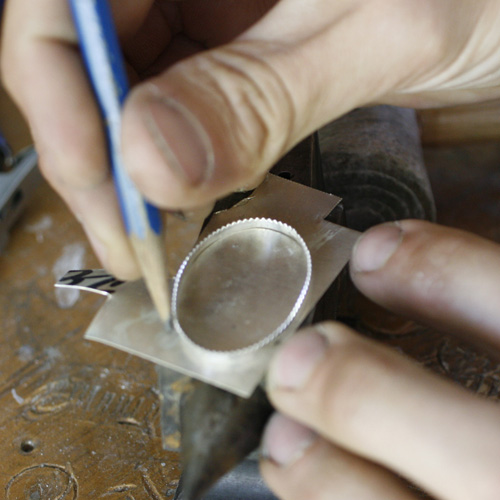
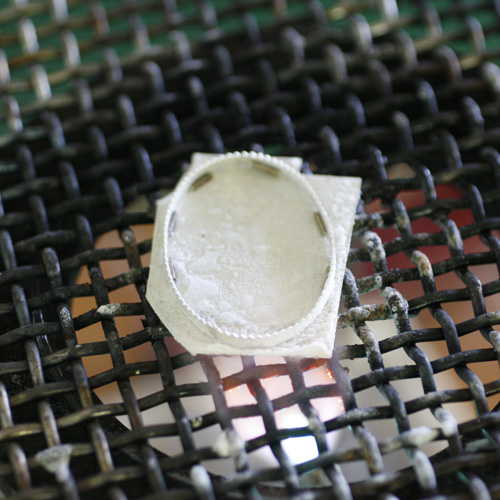
The base will be made from solid sterling silver. the bezel is placed on top of a sheet and an outline is traced by pencil or pen. This is then cut out with a pair of shears.
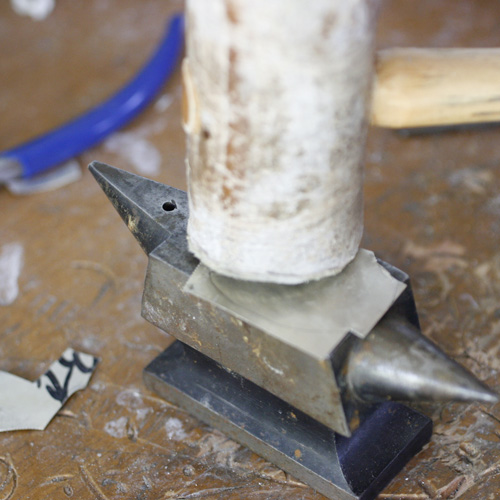
Since the metal is often bent at the corners from cutting it, I then place it on a perfectly flat metal anvil and hammer it flat again.
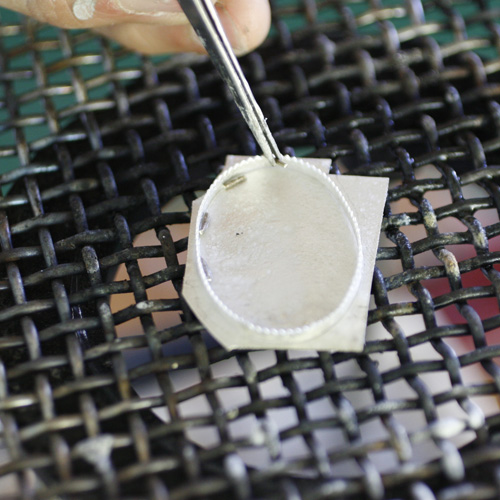
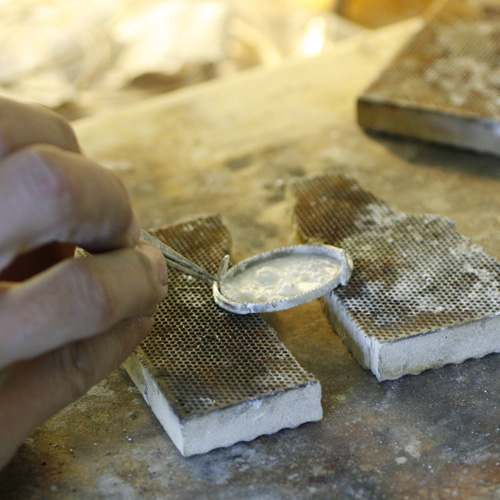
Flux is applied to both the bezel and the base and it is set on top of a metal mesh.
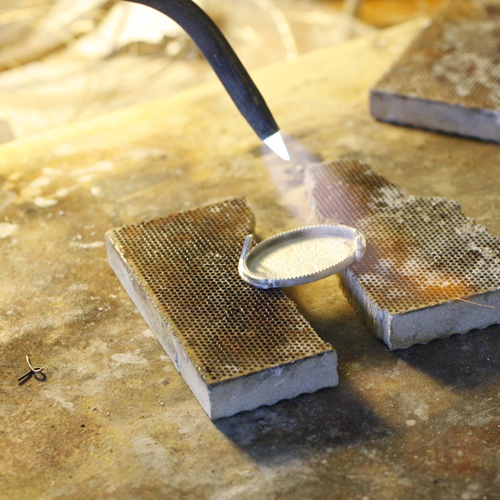
Solder is set against the joint on the inside of the bezel all the way around. The heat is applied from the top and the bottom, but since the bulk of the mass is in the base, it is important to heat it up from below so that the solder does not run up the sides of the bezel wire.
After cleaning (with the pickle!) I start to for the wire prongs in the design around the bezel cup.
Before soldering together, I trim off the excess base...
... and file the edges smooth.
A good solder joint will be invisible once sanded and polished.
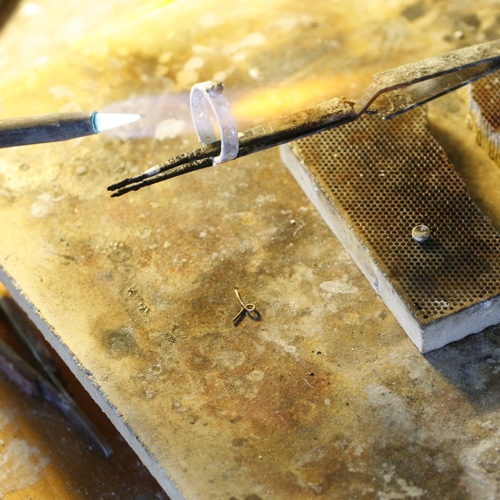
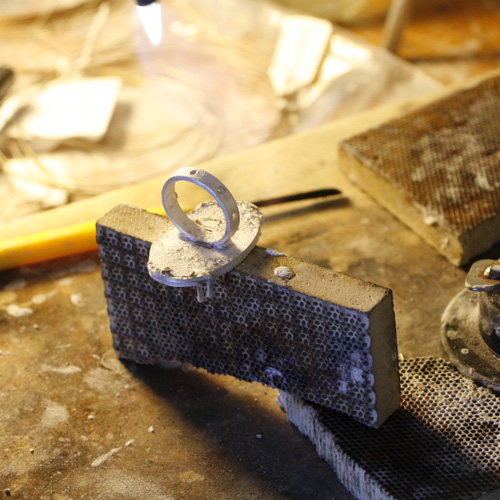
I've Bent the prongs and now I arrange everything in place to ensure a tight fit before soldering together.
The flux is applied to each piece and all five elements are arranged together. I set them up as a bridge between two pieces of ceramic so that when I solder, I can apply heat to all sides of the bezel cup.
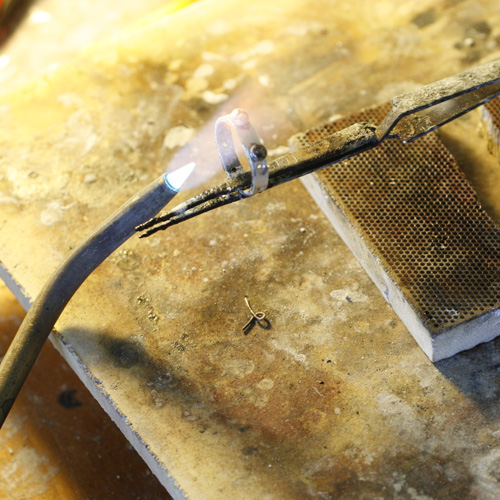
The flame is played across the entire piece; raising the temperature of the metal of each element at the same time so that the solder will flow into the seams. During each soldering operation, a lower temperature solder is used so that I don't melt the solder done in a previous operation. Once the solder flows, I turn off the torch and clean the piece... yet again!
The two main pieces are now almost ready to connect together. First I must provide a large area for the base of the setting and the ring to connect, so I file out a flat spot on the top of the ring. I usually will do this in the same place as the original solder joint.
Remember that the original sketch also showed two circles as extra support? Here I am preparing them to attach to the band. In this case I melt the solder onto the underside of each droplet first, using a different temperature solder for each one. I wouldn't want the first one to melt off the ring while soldering on the second!
The ring is held in the tweezers again and one of the droplets is set on top. The torch is used to heat up the ring and the droplet until the pre-applied solder melts again and flows evenly between the surface of the ring and the droplet.
The ring is rotated more flux is applied and the second droplet is now attached, taking care not to get the ring too hot or else the solder from the first droplet will melt and the drop will slide off the ring... groans will result!
In this case both droplets were attached without issues or groans! I continue to file the tops smooth in order to increase the area of contact between the band and the bezel cup.
The Last Soldering Operation! The flux has been applied to everything (this helps protect the metal) and the solder (very low temperature) sits on either side of the band where it sits on top of the setting. In this case I've rigged up an elevated platform to maximize the air and heat flow around the setting so that the heat can be applied evenly...
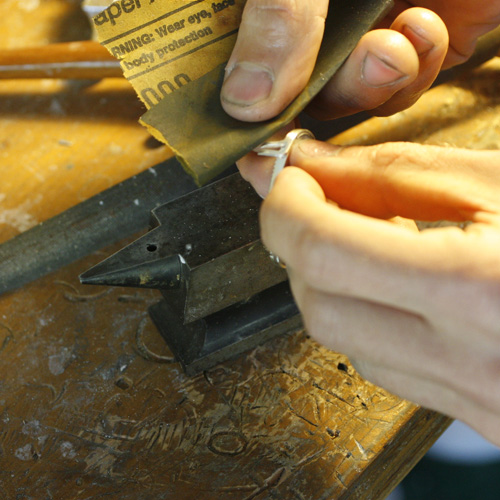
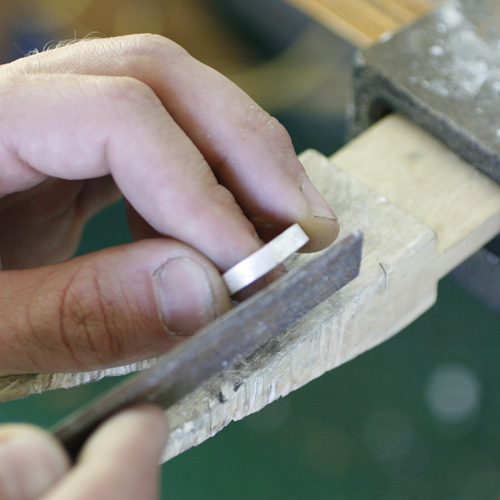
The band has been soldered to the bezel, cleaned for the last time in the pickle... I love saying that! The ring is given a final sanding, starting at 220 grit and run through 220, 400, 600, 800 and 1000 grit. In this case the ring had very few rough edges so this does not take very long. After 1000 grit, the ring looks pretty shiny, but still more work is to be done to get a mirror like polish.
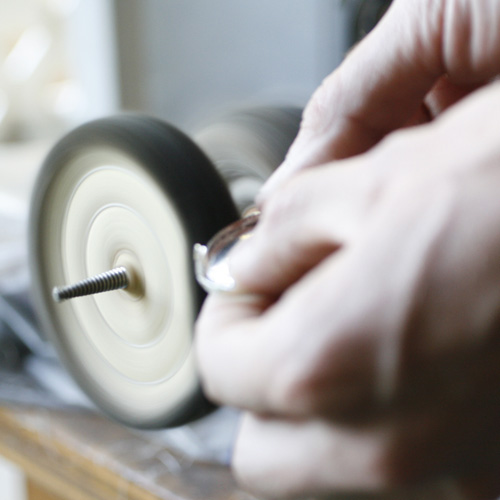
The ring will now go through two different polishing rouges. The first is Tripoli, a rough polish that will actually continue to smooth the metal and apply an excellent polish. You could stop here and have a perfectly good ring, but I like to take it one step further and polish a second time using black rouge, which is an excellent final polish. It will also help to keep the ring from tarnishing. The result is a shine so good you can see your face in it!
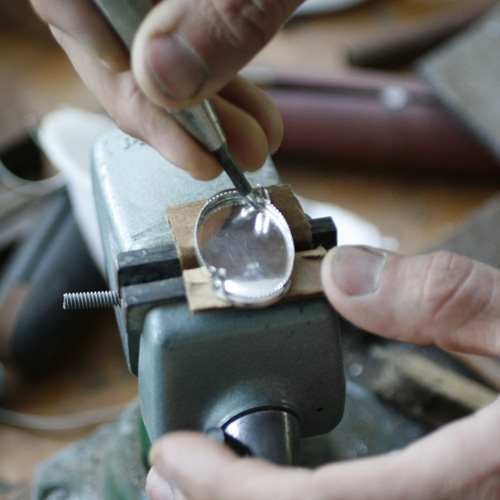
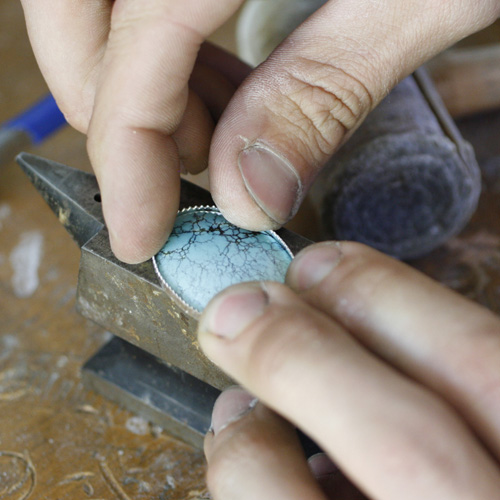
The ring is now ready to have that huge piece of turquoise set in it! Since the bzel may have been pushed inwards during polishing, I spread it back outwards with a polished steel "pusher"... yes, that is what we call it...
The turquoise is thin and brittle, so I am carful to set it in rather than forcing it in. I want the fit to be snug, but if too tight, an edge of the stone may chip off during this final stage. Note also that I have fresh cardboard surrounding the ring, protecting it against the vise.
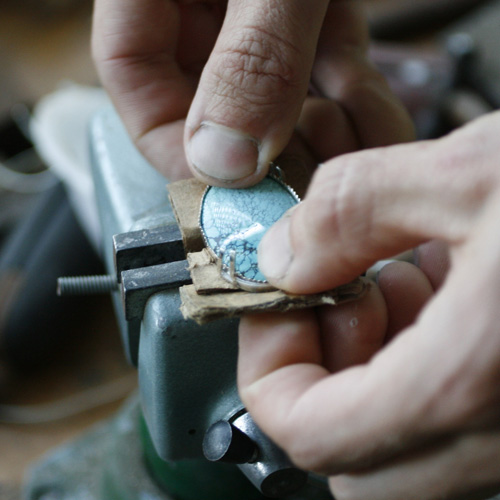
The pusher comes out again and is used to push the bezel against the stone. With some stones, A small hammer can also be used.

In this case I will use the small ball pink hammer to fold the prongs over. The head of the hammer is polished so that it will not leave any marks against the metal.
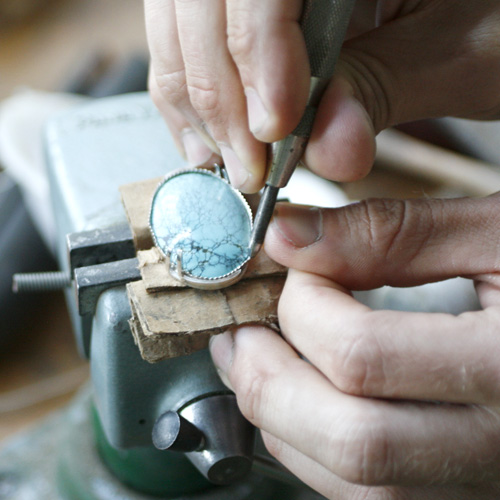
Once the prongs are close to the stone, I switch to a set of smooth jawed pliers to squeeze the prongs down further. In this case, the prongs are more for show than actual function, but I wish to get them up against the stone.
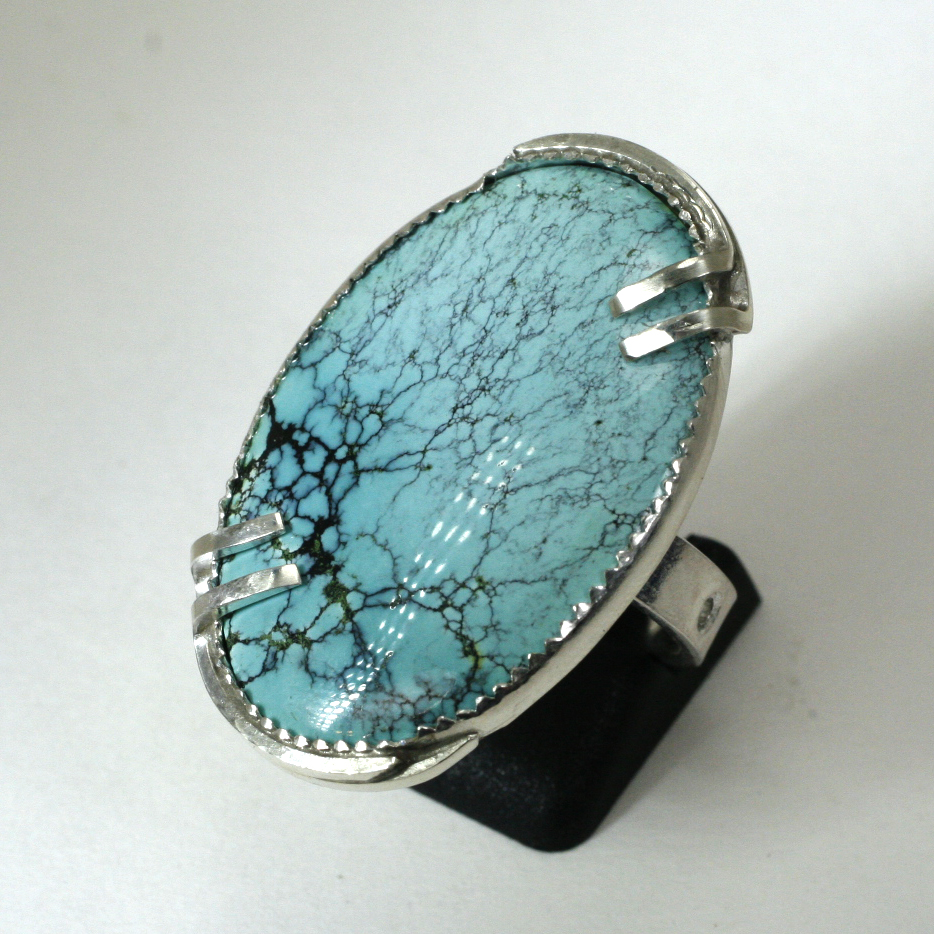
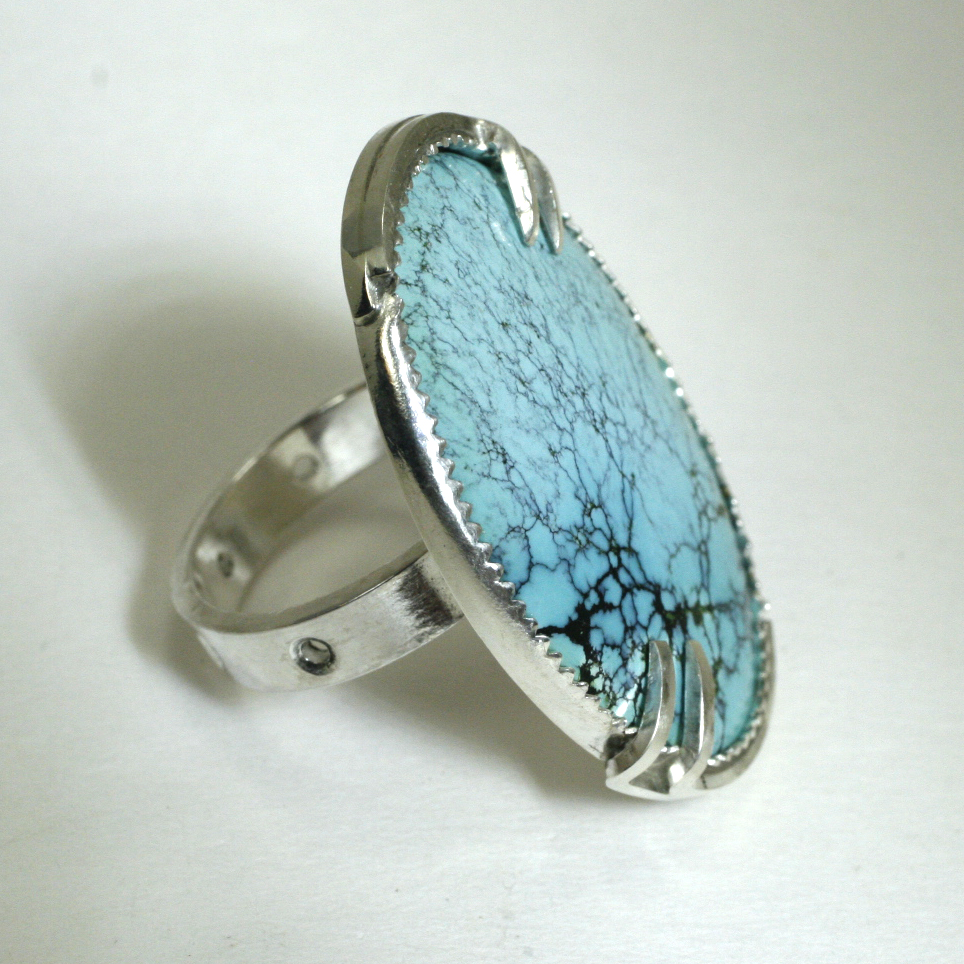
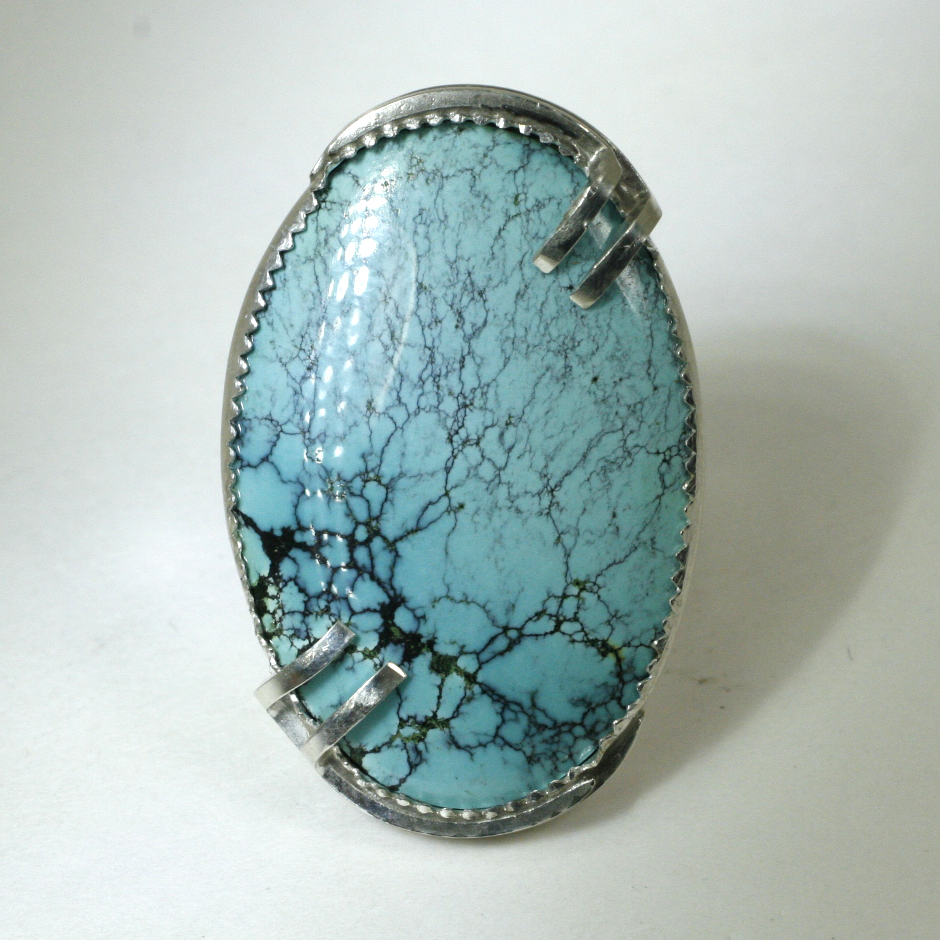
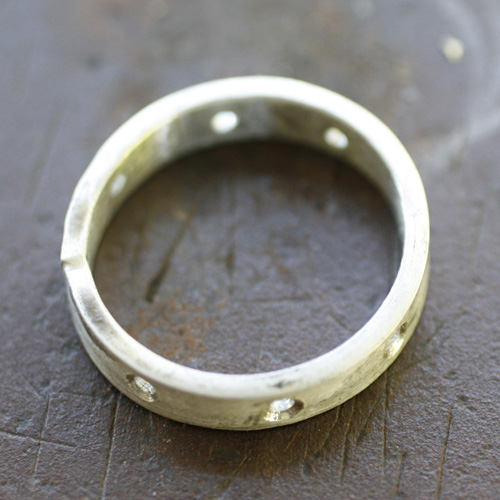
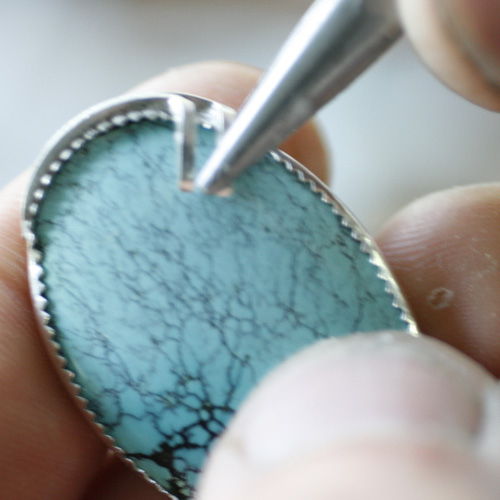
The ring is finished! The result is a beautifully crafted, one-of-a-kind, handmade turquoise ring!